Introduction

Friends, welcome to the world of embroidery.


I am trying to put in here simple videos that would teach some basic freehand embroidery stitches. I would also put in details of varieties of embroidery of India with pictures - some that I have collected and some that I have done myself.


Oct 9, 2011

Satin Stitch

Satin stitch is a type of filling stitch. It is generally used to do the flower petals, sometimes leaves and others patterns that require filling. See the following star that I have done with satin stitch.


Please watch the video and learn the stitch carefully. This needs a bit of attention and practice. So I suggest that you practice this as many times as you can.

Fly Stitch

Fly is another stitch that can be used for decorating a fabric creatively.
Closely worked fly stitch can be used for filling also.

Watch this demo to do it yourself!!


Buttonhole Stitch

Buttonhole stitch is also called blanket stitch. I suggest that you draw a double line to practise this stitch so that you get a even line of stitches.

In the picture below, see that the buttonhole stitch is used creatively.


Learn to do the stitch yourself from this video.

Chain Stitch

With tiny chain stitches you can create beautiful patterns. I have done this 'KOLAM' embroidery in chain stitch, with single strand of thread throughout.


Here are a couple inspiring embroidery in chain stitch.


1. Thread a needle with 2 strands of Anchor stranded cotton thread.
2. Tie a knot at the other end of the thread.

Note: As you do the embroidery, the thread becomes shorter. When about 3 inches of the thread is left in the needle, push the needle to the back side of the cloth and tie a knot. Take another length of 2 strands of thread and start stitching from the point you left earlier.

Here is the video demo for you to learn the stitch.

Oct 8, 2011

Stem Stitch

Stem stitch is another simple stitch that you can use to do the stems of a plant or even a continuous line of embroidery as per your imagination.

1. Thread a needle with 2 strands of Anchor stranded cotton thread.
2. Tie a knot at the other end of the thread.

Note: As you do the embroidery, the thread becomes shorter. When about 3 inches of the thread is left in the needle, push the needle to the back side of the cloth and tie a knot. Take another length of 2 strands of thread and start stitching from the point you left earlier.

Here is the video for stem stitch.

Back Stitch

See this cute little birdie done in back stitch. I got this picture from the net.


Here I give a video demo of the stitch. Will be glad to know how you did this stitch.

1. Thread a needle with 2 strands of Anchor stranded cotton thread.
2. Tie a knot at the other end of the thread.

Note: As you do the embroidery, the thread becomes shorter. When about 3 inches of the thread is left in the needle, push the needle to the back side of the cloth and tie a knot. Take another length of 2 strands of thread and start stitching from the point you left earlier.


Running Stitch

Look at this fascinating picture of Kantha embroidery. The simple running stitch is the basis of this eye-catching Kantha embroidery.


Here is a short video demonstrating the running stitch.

1. Thread a needle with 2 strands of Anchor stranded cotton thread.
2. Tie a knot at the other end of the thread.

Note: As you do the embroidery, the thread becomes shorter. When about 3 inches of the thread is left in the needle, push the needle to the back side of the cloth and tie a knot. Take another length of 2 strands of thread and start stitching from the point you left earlier.


Try this!!

I'll be glad to know how friendly the demo is. Do let me know!


Preparing the Cloth


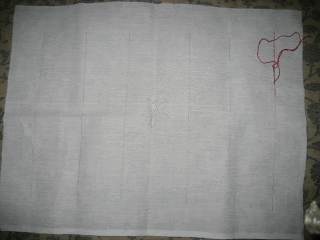
Please see the picture below. I had previously asked you to get ready a poplin cloth measuring 15 inches by 12 inches. Leave about 1 and 1/2 inch gap from all the 4 sides/edges and draw 6 lines using scale and pencil as shown in the figure. In the middle draw a small flower with 5 petals. This flower is for the satin stitch. Take care to draw thin lines. Do not draw very thick lines with very dark pencils. Otherwise the pencil marks may stain the cloth.


On each lines you will do one stitch.

Oct 7, 2011

Making A Knot At One End Of The Thread

I suggest you to watch this video a couple of times to learn to tie a know, and treat the following instructions as reference later.


I would also refer you to this site which gives great pictures teaching how to make a knot.
http://www.wikihow.com/Thread-a-Needle-and-Tie-a-Knot

Anyway, here are my instructions.
  1. Hold the threaded needle on its neck firmly on your left hand, so that the thread does not pull off.
  2. Pick up the other end of the thread on your right hand, between the thumb and the index finger.
  3. Twist and make a loop with the thread around your index finger.
  4. Now gently slide your finger and thumb against each other, rolling the thread. That is, twist/roll the loop by pressing the index finger against the thumb and moving the index finger towards the base of the thumb. You get a twisted loop.
  5. Gently gather and pull this loop to the end of the thread using your index finger or the middle finger. A knot is tied.

Threading the Needle

You may watch this video a couple of times to learn to thread a needle and treat the following instructions as reference later.


  1. Hold the needle on your right hand with the eye of the needle on top.
  2. Hold two strands of the thread on your left hand.
  3. Gently push the two strands through the eye of the needle.
  4. Pull the strands at the other side of the eye with your left hand to about 4 to 5 inches.
  5. Lo!! Now you have threaded the needle.
 

Cutting the Thread

Here I am going to tell you how to cut the necessary length of thread from the Anchor stranded cotton skein.

The following picture shows the thread skeins. Each skein is made up of 6 strands. We are going to use two strands of thread throughout our lessons.

Here is a video you may watch to learn to cut the necessary length of thread.


  1. Pick a colour of your choice.
  2. Locate an end of the skein.
  3. Gently pull out the end to about two feet or 24 inches length.
  4. Cut the thread of length about 16 inches.
  5. Hold one end of the thread. Pick up two strands on one hand and 4 strands on the other. Gently pull the ends apart.
  6. Now the thread below starts twisting and if you pull apart very fast you are sure to get the thread tangled. Gently untwist the thread and then again pull the two ends apart. Do this till the threads on the two hands separate completely.
Fantastic!!! you have now learnt to pull the threads apart!!
Now thread the needle with two strands of thread. (Threading the needle is explained in a separate)
When this thread gets over while embroidering, you can pull out another two stands from the left out 4 strands.

Oct 4, 2011

Mounting the Fabric on to the Frame

Here is a crisp video that shows you how you can mount the fabric on the embroidery frame. It is easy to view the crisp video. You may watch this video a couple of times to learn and treat the following instructions as reference later.


Note that for the initial stitches that you will learn, you may not use the frame, as the fabric that you use will be quite small in size. But it is always advisable to use frames as the stitches will be neat and you will not pucker the fabric accidentally. I suggest that you use frame definitely for satin stitch. For hemming, we cannot use the frame as hemming is done along the edges by folding the fabric.

Note:

You may or may not use the frame for learning the stitches. I suggest you to use the frame compulsorily for satin stitch though!!

Any way I am giving the step-by-step instructions below.

·         Slightly loosen the screw so that the two parts of the frame come apart loosely.

·         Place the full ring (without the screw) on a clean floor/table.

·         Place the fabric on this frame with the portion to be embroidered almost at the centre.

·         Now place the ring with the screw over the fabric to fit the bottom ring.

·         Gently bring both the rings together with the fabric in the middle.

·         Slightly tighten the screw to bring the two rings close together leaving a little space for the fabric to move.

·         Stretch the fabric outside the frame so that the fabric is taught.

·         Keep tightening the screw a bit and stretching the fabric little by little alternately so that the fabric is taught.

·         Now tighten the screw till you feel that the fabric will not loosen from the frame.